Life recently has been hectic to say the least and time to experiment with interesting recipes has been severely limited. Apart from a brief encounter with Eliza Acton (of which more in the future, she is definitely a cook to return to) I have been investigating sour dough in as many forms as I can.
I have been making sour dough loaves for years, ever since I went on a specialist bread making course and came away with my own pot of gently bubbling rye paste and detailed instructions of how to care for it. I have used this recipe time and again and it makes a very reliable loaf of bread. It fulfils my main cooking criteria of being virtually faff free and it tastes great.
With my own sour dough course looming I have been cooking as many of the other recipes and methods as I can and my freezer is slowly filling up with loaves for interested cookery students to sample. It is also filling up with lots of pots of gently bubbling flour and water paste for other people to take home a cherish.
Tuesday, 1 October 2013
Thursday, 12 September 2013
Life at the moment is full of Victorian jam tarts, (they were creative with preserves, I will give them that) and sour dough bread. With a sour dough course less than a month away now I am madly preparing lots of pots of bubbling, smelly, fermented wheat and rye creations. I need enough for everyone to take home, eno9ugh for everyone to cook with and enough different recipes to make the course interesting. Unfortunately, what I don't have at the moment is a working camera. I am the first to admit that sour dough does not make a very interesting picture but the jam tarts look quite decorative.
Wednesday, 3 July 2013
A selection of vegetable recipes from the 1600s
Introduction
Page contains a list of recipes from the 1600s and is designed to compliment the Forty Hall First Fruits event. I have written about most of these recipes elsewhere on my blog, website or Facebook. I have included links to these resources at the bottom of the page for people who would like to have a look.i am starting off with just the original recipes and then where I can I will add some modern instructions. Most of these recipes are in the public domain and have been for a long time. However a few are still under copy write and so I have not taken the liberty of reproducing the work of a modern cook whose book is still in print, that would be a bit too cheeky.
When choosing the recipes I have focussed on ones that are vegetarian, don't rely on exotic ingredients and don't use raw or lightly cooked eggs.
A quick look will show you that the cookery writers of the time did not feel constrained by quantities and the lack of accurate measurements can be very annoying to modern cooks. If it helps, try to think of this in a positive way, if you hate a certain ingredient then use it very sparingly. Make small quantities to start with and have fun experimenting until you arrive at a recipe that works for you.
Recipes
To butter Gourds, Pumpions, Cucumbers or Muskmelons. Robert May 1660
Cut them into pieces, and pare and cleanse
them; then have a boiling pan of water, and when it boils put in the pumpions,
&c. with some salt, being boil’d, drain them well from the water, butter
them, and serve them on sippets with pepper. Otherways. Bake them in an oven,
and take out the seed at the top, fill them with onions, slic’t apples, butter,
and salt, butter them, and serve them on sippets. Otherways. Fry them in
slices, being cleans’d & peel’d, either floured or in batter; being fried,
serve them with beaten butter, and vinegar, or beaten butter and juyce of
orange, or butter beaten with a little water, and served in a clean dish with
fryed parsley, elliksanders, apples, slic’t onions fryed, or sweet herbs.
Vegetables in 1600s
A list of Vegetables from 1669
(I will be adding to this post in the future)Sir Kenelm Digby was a gentleman, a privateers, diplomat, scientist and intellectual. During his varied life, lived through one of England's most turbulent periods of history, he collected recipes from his friends. Published after his death, The Closet of the Eminently Learned Sir Kenelme Digbie Knight Opened, covers and extraordinary range of subjects and gives so many recipes for different alcoholic drinks that you might be forgiven for thinking that the favourite hobby of the English aristocracy was making home brew.
 |
| Sir Kenelm Digby, artist unknown |
At the very end, in Appendix III it lists all of the herbs, flowers, fruits and less common vegetables used in the cook book along with other flavourings. He does add that he left out the more common vegetables. For instance I know that he definitely has recipes that include peas, beans and asparagus. So for anyone interested in what green and growing things the people of the 17th century might have been using, here is the list. I have added some spacings.
It must be remembered that Sir Digby was wandering around Europe with the royal court who would have had access to a lot more food than everyone else.
APPENDIX III A LIST OF THE HERBS, FLOWERS, FRUITS, ETC.,
REFERRED TO IN The Closet Opened:—
1. Agrimony; alexander; angelica; avens,
leaves & flowers; balm; bay-leaves; beet leaves; bettony, wild; bettony,
Paul's; bistort; bloodwort; bluebottles; blue-button; borage, leaves &
flowers; bramble, red, tops of; broom-buds; bugle; bugloss, leaves &
flowers; burnet; carduus benedictus; carrot, wild; celandine; cersevril;
chicory; chives; clove gilly-flowers; clown's all-heal; coltsfoot; comfrey;
cowslip & French cowslip flowers; dragons; elder flowers; endive;
eyebright; fennel; fever-few; garlic; ground-ivy; groundsel; hart's tongue,
leaves; hops, flowers; horehound; hypericum, tops & flowers; hyssop;
ladies' mantle; lettuce, leaves & stalks; lily of the valley; liquorice;
liverwort; maidenhair; marigold, flowers & leaves; marjoram, sweet;
marjoram, wild; marshmallow, leaves, flowers, & stalks; may-weed, brown;
meadowsweet; mellilot, flowers; mint; spearmint; mouse-ear; mugwort; muscovy;
nettle, red; oak of Jerusalem; organ; origanum [wild marjoram]; oseille;
parietary; peas (chick); pellitory-of-the-wall; penny-royal; philipendula;
pimpernel; pourpier; primrose, flowers; purslane; ribwort; rocket; rosemary,
tops, flowers, & sprigs; rose; rue; sage, (red & wild), leaves &
flowers; saxifrage; sanicle; scabious; scurvy grass; self-heal; shallots; sibboulets; skirrets; smallage; sorrel (wood); spike [spignel?];
spleenwort; spinach; St. John's wort; strawberry leaves; sweetbriar, leaves,
tops, buds; sweet oak; sweetwort; tamarisk; tansy; thyme (broad, lemon, mother,
& wild); violet, leaves & flowers; wallflowers (yellow); wall rue;
watercress; wheat (green); white-wort; winter savoury; woodbine; wormwood (sea
& Roman); yarrow. (From this list I have omitted the commoner vegetables.)
2. Roots.—Alexander; angelica; asparagus; beet; betony, bittersweet;
bluebottle; borage; coltsfoot; elecampane; eringo; fennel; fern; galingale;
horse-radish; marshmallow; nettle (red); orris; parsley; scabious; sorrel;
strawberry; succory; thyme (wild); tormentilla.
3. Seeds.—Anise; cardamom;
carraway; citron; coriander; fennel; gromwell; melon; musk grains; mustard;
nettle; parsley; saffron; tulip, seedy buds of; wormwood.
4. Fruits.—Apples
(codlings, ginet moils, pearmains, pippins, golden pippins, red streaks);
apricots; barberries; bilberries; cherries (black, Kentish, Morello); currants
(dried, black, red); damsons; dates; jujubes; juniper berries; lemons; pears
(bon chrétien & wardens); plums; prunes; raisins; rasps; sweetbriar
berries; strawberries.
5. Barks, woods.—Ash-tree bark; lignum cassiæ.
6.
Nuts.—Almonds; chestnuts; pine kernels; pistachios; walnuts (green).
7.
Juices.—Balm; celandine; cherry; hop; lemon; onion; orange; spearmint; spinach;
tansy.
8.—Distilled waters of angelica; cinnamon; mallow; orange-flower;
plantain; rose (red & damask).
9. Spices of all sorts; cloves; cinnamon
(also oil of, & spirit of); ginger; mace; mustard; nutmeg; pepper;
peppercorns.
10. Wines.—Canary sack; claret; Deal; elder; Malaga (old); Muscat;
Muscadine (Greek); red; Rhenish; sack, sherry sack; Spanish; white.
11. Other liquors.—Ale & beer; afterworts; lees of beer & wine; aqua
vitæ; orangeado.
12. Vinegars of elder wine, & of white wine.
13. Verjuice
of cider, & green sour grapes.
14. Other notable seasonings and
ingredients:— Ambergris; ivory; leaf gold; powder of white amber; powder of
pearl; Spanish pastilles
Digby, Kenelm
(2011-12-22). The Closet of Sir Kenelm Digby Knight Opened (New
Illustrated) (Kindle Locations 3755-3781).
. Kindle Edition.
Sunday, 16 June 2013
Spinach tart, recipe 2
With only a month to go until Forty Hall's First Fruits event it is time to start whittling down the possible recipes to the ones which are authentic but also taste nice. This is one of my favourite vegetable recipes from the period, a spinach tart by the ever reliable Elinor Fettiplace.
Made with spinach and eggs flavoured with rosewater, currants, ginger and cinnamon, the recipe can sound a bit odd to modern tastes. The secret is to use the spices sparingly. A look in a middle eastern cook book will show you any number of recipes that rely on the same flavour combinations. They are almost always used in moderation and to very great effect.

Made with spinach and eggs flavoured with rosewater, currants, ginger and cinnamon, the recipe can sound a bit odd to modern tastes. The secret is to use the spices sparingly. A look in a middle eastern cook book will show you any number of recipes that rely on the same flavour combinations. They are almost always used in moderation and to very great effect.

http://www.fortyhallestate.co.uk/whats-on/events/forty_halls_first_fruits
Tuesday, 14 May 2013
Sweet potato bake
The very first time I tried sweet potato was at a Thanksgiving dinner hosted by friends in Newcastle. They baked it with sugar and cinnamon and topped it off with mini marshmallows. They served it right next to the turkey and potatoes as part of the main course. Then they sat back and played an amusing game of watching the English woman be really polite and try and eat it. It wasn't that I didn't like their sweet potato dish, it was just that it needed to be in a bowl of its own and served with a good dollop of cream.
I am telling you this so all forgive me for cheating in my latest experiment and intentionally leaving out the sugar. Not only did I know that I wouldn't like it with extra sugar added but also I wanted to feed it my children for dinner and they don't need any more sugar in their diet.
So, buttered sweet potato, another recipe from the ever reliable Elinor Fettiplace's Receipt Book. By 1604, the date at the start of her book, the potato had arrived in Britain but it was the sweet potato that people were eating. Elinor suggests that this mix of potato, sugar, orange peel, orange juice, butter and rosewater can either be boiled or baked in a pie crust. I baked mine in a dish (not having time for pastry making today).

I have to say that this tasted lovely. Not only will it be making a star appearance at my Forty Hall demonstration but will also be finding its way into our family menus as well. The orange flavour worked so well with the sweet potato although I am not sure that I could taste the rosewater. It is easy too, just needs a bit of planning. Could easily be made in advance and reheated.
And as to the sugar? Well, I think I will be making a version with sugar and serving it as a pudding in a sweet pastry case, topped with cream.
I am telling you this so all forgive me for cheating in my latest experiment and intentionally leaving out the sugar. Not only did I know that I wouldn't like it with extra sugar added but also I wanted to feed it my children for dinner and they don't need any more sugar in their diet.
So, buttered sweet potato, another recipe from the ever reliable Elinor Fettiplace's Receipt Book. By 1604, the date at the start of her book, the potato had arrived in Britain but it was the sweet potato that people were eating. Elinor suggests that this mix of potato, sugar, orange peel, orange juice, butter and rosewater can either be boiled or baked in a pie crust. I baked mine in a dish (not having time for pastry making today).
I have to say that this tasted lovely. Not only will it be making a star appearance at my Forty Hall demonstration but will also be finding its way into our family menus as well. The orange flavour worked so well with the sweet potato although I am not sure that I could taste the rosewater. It is easy too, just needs a bit of planning. Could easily be made in advance and reheated.
And as to the sugar? Well, I think I will be making a version with sugar and serving it as a pudding in a sweet pastry case, topped with cream.
Wednesday, 1 May 2013
Green Pudding
For 2 weeks now I have been trying to write a post about green pudding. This is a funny little boiled cake recipe that I want to do at the Forty Hall demonstration. It tastes nice or at least it will taste nicer next time with less nutmeg and more sugar. It is easy to make and comes out a bright green colour. The colour comes from spinach, and when I manage to grow some, marigolds as well. This adds a little bit to the flavour. What I like about the recipe is that boiling the cake means you can make them without an oven. i might even try them next time I am camping.
Unfortunately, every time I try to load a picture to Blogger, it crashes my computer. I have put the photo of the finished product up here:
http://www.facebook.com/photo.php?fbid=168693689961428&set=a.129968603833937.29726.121042111393253&type=1&theater
So the main point of my post is to ask a question. If you were going to a historical food demonstration would you rather taste the food exactly as the recipe states (as far this is possible), even though it is really horrible, or would you rather have the flavours toned down and balanced for a modern palate so you can actually eat it?
Saturday, 13 April 2013
Friendship cake
A long post but with lots of information, I hope.
This post is for anyone with a friendship cake, it went around our village 2 years ago so I am not sure that many people will still be faithfully keeping theirs going. I was given mine by a friend and it came with a full page of care and cooking instructions, copied by a very wobbly photocopier. The instructions were clear, concise and worked, which when all is said and done, is what you want in a recipe. The best bit was that the cake tasted lovely, not too sweet and with some real depth of flavour. I managed to keep it up for about three weeks before I decided it was too much effort and that it was time to start experimenting with the instructions.
After lengthy stays in my fridge and freezer and a varied diet of every sort of milk, flour and sugar that I have had in the house I can now say that my friendship cake, otherwise known as Herman, is nowhere near as delicate or fussy as the original instructions suggest. It is possible to leave it alone for a long time with no dire consequences, you can adjust the quantities to make a lot less. Lastly, it is possible to use this not just as a flavour enhancer, there is enough yeast to use the starter as a sour dough and use it to leaven your cake without any other rising agents. Here goes.....

Original Recipe
To feed cake mix
Day 1
Take 1 starter (I can provide some if you are local to Surrey)
Add 1 tea cup each of flour, sugar and milk
Stir well
Leave for 3 days, uncovered on the side in kitchen
Day 4
Add another tea cup each of flour, sugar and milk
Stir well
Leave for another 5 days
Day 9
Add another tea cup each of flour, sugar and milk
Divide your mixture into 4 equal amounts
Give 3 away
Keep 1 and use it to make the cake on day 10
Day 10 - Cake day
Stir your cake mix and add
1 cup sugar
2 cups plain flour
2 heaped tsp baking powder
2 eggs
2 tsp vanilla essence
2 tsp ground cinnamon
1/2 tsp salt
2/3 cup cooking oil
2 apples cut into small chunks
1/2 cup walnuts optional
1 cup raisins (optional)
Mix it all together, pour into a well greased cake tin (I use a small, square roasting tin that measures about 8 inches on each side)
Sprinkle 1/4 cup fo brown sugar over the top
Bake for 45 minutes at about 170 to 180 degrees C.
My version of the sour dough recipe
First up, some notes.
So, with all this in mind....here are my suggested instructions for Herman, the Friendship Cake
Day 1 Receive your lovely new pot of cake mix, bubbling away merrily and giving off a fainly sour, beery smell.
Put it in the fridge, covered for a few days until you have time to sort it all out.
Take it out of fridge and leave overnight, still covered, in a warm kitchen.
Feed with 1 tea cup each of flour, sugar and milk.
Cover again and leave somewhere warm for at least 3 days to ferment.
It will bubble up quite a lot so make sure it is in a large enough tub.
Weigh out around 200 grams of mix and use this to make the cake.
Leave the rest in the tub or pot, feed again with more milk, flour and sugar and pop it in the fridge again.
To make a cake without added raising agent..
Take your 200g of mix and add 1 cup of flour,
Stir well (it will be quite stiff)
Cover with a tea towell and leave for a few hours or over night. This is making a sour dough sponge where the yeast is multiplying in the flour.
Next day add all other over ingredients, stir well and put in a tin.
Leave to rest somewhere warm until you see some bubbles coming to the surface, this will take about an hour or two.
Then bake as normal.
If all goes well, then the cake should rise in just the same way as if it had baking powder added or was made with self raising flour.
This post is for anyone with a friendship cake, it went around our village 2 years ago so I am not sure that many people will still be faithfully keeping theirs going. I was given mine by a friend and it came with a full page of care and cooking instructions, copied by a very wobbly photocopier. The instructions were clear, concise and worked, which when all is said and done, is what you want in a recipe. The best bit was that the cake tasted lovely, not too sweet and with some real depth of flavour. I managed to keep it up for about three weeks before I decided it was too much effort and that it was time to start experimenting with the instructions.
After lengthy stays in my fridge and freezer and a varied diet of every sort of milk, flour and sugar that I have had in the house I can now say that my friendship cake, otherwise known as Herman, is nowhere near as delicate or fussy as the original instructions suggest. It is possible to leave it alone for a long time with no dire consequences, you can adjust the quantities to make a lot less. Lastly, it is possible to use this not just as a flavour enhancer, there is enough yeast to use the starter as a sour dough and use it to leaven your cake without any other rising agents. Here goes.....
Original Recipe
To feed cake mix
Day 1
Take 1 starter (I can provide some if you are local to Surrey)
Add 1 tea cup each of flour, sugar and milk
Stir well
Leave for 3 days, uncovered on the side in kitchen
Day 4
Add another tea cup each of flour, sugar and milk
Stir well
Leave for another 5 days
Day 9
Add another tea cup each of flour, sugar and milk
Divide your mixture into 4 equal amounts
Give 3 away
Keep 1 and use it to make the cake on day 10
Day 10 - Cake day
Stir your cake mix and add
1 cup sugar
2 cups plain flour
2 heaped tsp baking powder
2 eggs
2 tsp vanilla essence
2 tsp ground cinnamon
1/2 tsp salt
2/3 cup cooking oil
2 apples cut into small chunks
1/2 cup walnuts optional
1 cup raisins (optional)
Mix it all together, pour into a well greased cake tin (I use a small, square roasting tin that measures about 8 inches on each side)
Sprinkle 1/4 cup fo brown sugar over the top
Bake for 45 minutes at about 170 to 180 degrees C.
My version of the sour dough recipe
First up, some notes.
- This is a live yeast mix, it is not killed by cold temperatures in the fridge or even the freezer! You can put it in either with no ill effects as long as you don't leave it too long.
- You can cover it up for a few days as long as your pot is big enough to allow for some spare air space.
- If you are in the habit of using anti bacterial sprays, spray polish or any other chemical sprays then I would strongly recommend coving your cake sour dough. All these cleaning sprays are poisonous to you and your sour dough.
- You don't have to make the large quantities in the recipe above, yes I know it is nice to give some away sometimes and that is fine but if you start to see friends running in the opposite direction every time you take out a lunch box then it is time to take the hint :-).
- Yeast is killed by alcohol and carbon dioxide. This is a problem as when yeast feeds on the sugar it produces alcohol and CO2. If you leave the cake mix too long between feeds then it effectively poisons itself. However, once you have got used to the normal smell and taste of your mix there is nothing to stop you experimenting with how long you can leave it between feeds to build up a nice, beery flavour which will add depth to your final cake.
- I have fed the sour dough with wholemeal flour and rye flour, with no problem, I have also used oat milk or soya milk instead of cows milk. It all seems to work just fine. The only thing to remember is that traces of the flour and milks will remain in your sour dough even after a few cycles so be careful with allergies.
- When you are fed up with it all then feed the mix one, last time and pop it in the freezer. The longest I have frozen mine for was 14 months. When it came out it was very beery smelling indeed. I fed it again (although signs did not look at all good) and left it alone. It took four days for bubbles to start to appear again but the mix recovered very nicely indeed and is the same one as you can see in the pictures here.
So, with all this in mind....here are my suggested instructions for Herman, the Friendship Cake
Day 1 Receive your lovely new pot of cake mix, bubbling away merrily and giving off a fainly sour, beery smell.
Put it in the fridge, covered for a few days until you have time to sort it all out.
Take it out of fridge and leave overnight, still covered, in a warm kitchen.
 |
| My sour dough after it has been in the fridge for a week. At the top you can see the smooth surface and below, where it has been stirred, the lovely, bubbly texture that shows it is still alive with plenty of gluten in the flour to hold the bubbles. |
Feed with 1 tea cup each of flour, sugar and milk.
Cover again and leave somewhere warm for at least 3 days to ferment.
It will bubble up quite a lot so make sure it is in a large enough tub.
Weigh out around 200 grams of mix and use this to make the cake.
Leave the rest in the tub or pot, feed again with more milk, flour and sugar and pop it in the fridge again.
To make a cake without added raising agent..
Take your 200g of mix and add 1 cup of flour,
Stir well (it will be quite stiff)
Cover with a tea towell and leave for a few hours or over night. This is making a sour dough sponge where the yeast is multiplying in the flour.
Next day add all other over ingredients, stir well and put in a tin.
Leave to rest somewhere warm until you see some bubbles coming to the surface, this will take about an hour or two.
Then bake as normal.
If all goes well, then the cake should rise in just the same way as if it had baking powder added or was made with self raising flour.
Saturday, 6 April 2013
Plum jam 1604
This is for the ladies of the Christ Church Ladies Group, and anyone else who would like to try a new way for making jam.
In 1603 a Lady called Elinor Fettiplace started a recipe book for own use. It included recipes for medicines as well as food, many of which were donated by her friends and relatives. In the mid 1970's it was discovered by Hilary Spurling in an attic belonging to her husband's aunt.
After years of tracing the family right back to Elinor, although I think not directly, and cooking the recipes, Hilary Spurling published "Elinor Fettiplace's Receipt Book." I have taken this jam recipe from Elinor and have used it so far for black currents, strawberries and plums.
"Take to every pound of plums a pound of sugar, then beat it smal, & put so much water to is as will wet it, then boyle it till it bee sugar againe, then put in the plums, & let them boile very softlie, till they be doone, then when they bee cold put them up, if they begin to grown then set them where fire is in a cupboard; you may doe respis this way & gooseberries, but you mush boyle them verie soft, & not put them up till they bee cold, & likewise may Cherries bee doone as your gooseberries & respis."
In other words,
Take 1lb of plums, wash, dry, chop up and de-stone
Mix 1lb of sugar with 1/4 pint of water
Gentle heat and stir until all the sugar has dissolved
Then turn up the heat and boil rapidly until it is 115 degree Celsius or until a small amount dropped into a glass of water forms a soft ball with very little or no tail.
Take of the heat and stir hard until the sugar crystallises. If necessary put your saucepan in a large bowl of sink or cold water and keep stirring, that will cause the crystallisation you want.
Add you plums
Put back onto a very low heat
The still hot sugar will gently warm the plums and cause the juice to flow
As more juice flows, the sugar will dissolve again
Stir gently from time to time (or chip away at the sugar) and gradually you will get a jam like mixture
Keep going with the gentle heat and stirring until a setting point is reached.
To check setting point:
Drop a small amount onto a cold plate and leave for a minute or two. Gently push the jam with your finger. If it wrinkles on top then it is ready to set. If it doesn't, boil or in this case warm gently, for another 5 minutes.
Notes:
If it doesn't set quick enough then you can bring it to the boil but that might depend on how much time you have.
Once it is bottled I found that larger jars can take up to several days to set fully while smaller ones should set overnight. I don't know why.
If it doesn't set in the jar then you can empty them out and re-boil, or store the jam jars in the freezer until you are ready to use them
One day I will try and do a post of ways to you can use up jam that has gone wrong, or rather still tastes fantastic but hasn't reached a perfect setting point.
Reference:
Spurling, Hilary, "Elinor Fettiplace's Receipt Book," Penguin Books 1987
In 1603 a Lady called Elinor Fettiplace started a recipe book for own use. It included recipes for medicines as well as food, many of which were donated by her friends and relatives. In the mid 1970's it was discovered by Hilary Spurling in an attic belonging to her husband's aunt.
After years of tracing the family right back to Elinor, although I think not directly, and cooking the recipes, Hilary Spurling published "Elinor Fettiplace's Receipt Book." I have taken this jam recipe from Elinor and have used it so far for black currents, strawberries and plums.
"Take to every pound of plums a pound of sugar, then beat it smal, & put so much water to is as will wet it, then boyle it till it bee sugar againe, then put in the plums, & let them boile very softlie, till they be doone, then when they bee cold put them up, if they begin to grown then set them where fire is in a cupboard; you may doe respis this way & gooseberries, but you mush boyle them verie soft, & not put them up till they bee cold, & likewise may Cherries bee doone as your gooseberries & respis."
 | |
| After the sugar has melted from the juice flowing out of the warmed plums |
In other words,
Take 1lb of plums, wash, dry, chop up and de-stone
Mix 1lb of sugar with 1/4 pint of water
Gentle heat and stir until all the sugar has dissolved
Then turn up the heat and boil rapidly until it is 115 degree Celsius or until a small amount dropped into a glass of water forms a soft ball with very little or no tail.
Take of the heat and stir hard until the sugar crystallises. If necessary put your saucepan in a large bowl of sink or cold water and keep stirring, that will cause the crystallisation you want.
Add you plums
Put back onto a very low heat
The still hot sugar will gently warm the plums and cause the juice to flow
As more juice flows, the sugar will dissolve again
Stir gently from time to time (or chip away at the sugar) and gradually you will get a jam like mixture
Keep going with the gentle heat and stirring until a setting point is reached.
To check setting point:
Drop a small amount onto a cold plate and leave for a minute or two. Gently push the jam with your finger. If it wrinkles on top then it is ready to set. If it doesn't, boil or in this case warm gently, for another 5 minutes.
Notes:
If it doesn't set quick enough then you can bring it to the boil but that might depend on how much time you have.
Once it is bottled I found that larger jars can take up to several days to set fully while smaller ones should set overnight. I don't know why.
If it doesn't set in the jar then you can empty them out and re-boil, or store the jam jars in the freezer until you are ready to use them
One day I will try and do a post of ways to you can use up jam that has gone wrong, or rather still tastes fantastic but hasn't reached a perfect setting point.
 | |
| Pastry case, plum jam, sponge cake nearly ready to go on top. |
Reference:
Spurling, Hilary, "Elinor Fettiplace's Receipt Book," Penguin Books 1987
Thursday, 4 April 2013
Grow your own ingredients
You don't have to read very far through a 17th century cookery book to realise that if you want to try out some of the recipes then you are going to have to get your gardening gloves on.
 This year I am hoping to try pickled nasturtium buds and green pudding with marigold flowers. I have bought the seeds. I managed to dig over a flower bed during a freak afternoon when the sun actually shone and both my children played nicely for 2 whole hours. All I need now is a bit of warmth! Hear that weather, we need sunshine and heat or else gardeners and farmers in this country are not going to be growing very much at all.
I did want to try preserving broom flowers, the local garden centre had some nice, compact plants that were about to come into flower some weeks ago now but there was no point buying one as the ground was way too cold to dig.
I did want to try preserving broom flowers, the local garden centre had some nice, compact plants that were about to come into flower some weeks ago now but there was no point buying one as the ground was way too cold to dig.
Sunday, 31 March 2013
Sour dough
I learnt how to make sough dough on a very nice training course at a Yorkshire cafe a few years ago. Their in house baker (who had previously won baker of the year so really did know what he was talking about) was passionate about pure, natural bread with nothing added and nothing taken away.
He led us through the intricacies of making a rye flour starter, keeping it alive and using it to make some very tasty bread indeed. Since then I have sucessfully made the starter, kept it going for weeks or months or, more honestly, until I got bored, and used it to make bread. I followed the precise ingredients and instructions to the letter and it worked very well.
Not once, in all of this did it occur to me how many different ways there are of making sour dough until I started researching historic recipes for earnest.
Now, the more I read the more I realise that there are as many different recipes for sour dough as there are cooks and most of the recipes make it clear that theirs is the best and only way to make it work.
This set me to thinking that as long as you mix flour and water together then in the end it will go off and the chances are that as long as you don't leave it until it is actually mouldy then you may well have a good sour dough.
This naturally led to a spot of experimenting. First up, the leave a bit of dough from the last batch method. Gervase Markham (1616) advises leaving a bit of your batch of bread, filling it well with salt and using it for your next loaf of bread. It must be noted that he does include yeast or at least ale balm in the next batch. Darina Allen of the Ballymaloe cookery school advises leaving some dough in a jam jar in the fridge and using it to flavour your next batch.
I took 2 lots of dough and left one in the fridge, nice and easy. The other one I mixed with a tablespoon of salt and left in a plastic box in a cool pantry. I left both of them for about a week.
 This is the fridge one, it is just a piece of knocked back dough, a bit grey but close up you can see that it has an open texture. It smelt sour but not bad or off.
Following the modern instructions, I made the weight up to a pound of flour, added a teaspoon of salt and sugar and warm water as if making ordinary bread but without any added yeast.
 This is salted one and at first glance it looks healthier, a more natural flour colour and it didn't even smell that sour. A closer glance shows that it had gone a bit hard in the middle but not bad. It hadn't risen at all and it looked like a pretty nasty lump of dough. The box was very wet where the salt had drawn moisture out of the bread. This pictures really don't show it well at all, but this one definitely looked dodgy.
I first rinsed off as much surface salt as possible and then followed the 17th century instructions. I ripped the dough into small pieces, covered it with warm water and left the water to stand. A couple of hours later I strained the water and used it to make the bread. I used 1lb of flour, 1 tsp of sugar but no salt.
I left both sets of dough to rise overnight. It will probably come as no great surprise that the salted dough did not rise at all, not even a small amount. The salt had completely killed the yeast, even though it had stopped the dough going bad in storage. The fridge batch had risen quite well.
I mixed some instant action yeast into the flat dough, left them to prove in the tins and then baked them.
They were both slow to rise but they came out of the oven looking remarkably similar, there really was nothing to choose between them and more importantly they tasted pretty much the same as well. I would really have struggled to tell them apart, both had a subtle, sour flavour. Same result in flavour but one was a good, if slow, way of raising the bread, the other just added flavour.
A more interesting experiment that would take some years to do is Markhams recipe for course, brown bread for servants. This recipe is a mix of flours from different cereals and peas. He says to make especially sure to use boiling water to mix the dough as this stops the peas making the bread taste rancid and then he says to mix it and leave it in your sour trough over night. I am assuming that using the same wooden trough (and it must have been large for the quantities he was using) would have built up a yeast culture all of its own. He adds that if your trough is not sour enough then you can add some leaven or let it lie longer in the trough.
I am now going to be on the look out for people who have tried this. Any method that involves not washing all your equipment in antibacterial washing up liquid (which would kill the yeast) would not make the Environmental Health Department happy so I have to be a bit careful, still one day....
He led us through the intricacies of making a rye flour starter, keeping it alive and using it to make some very tasty bread indeed. Since then I have sucessfully made the starter, kept it going for weeks or months or, more honestly, until I got bored, and used it to make bread. I followed the precise ingredients and instructions to the letter and it worked very well.
Not once, in all of this did it occur to me how many different ways there are of making sour dough until I started researching historic recipes for earnest.
Now, the more I read the more I realise that there are as many different recipes for sour dough as there are cooks and most of the recipes make it clear that theirs is the best and only way to make it work.
This set me to thinking that as long as you mix flour and water together then in the end it will go off and the chances are that as long as you don't leave it until it is actually mouldy then you may well have a good sour dough.
This naturally led to a spot of experimenting. First up, the leave a bit of dough from the last batch method. Gervase Markham (1616) advises leaving a bit of your batch of bread, filling it well with salt and using it for your next loaf of bread. It must be noted that he does include yeast or at least ale balm in the next batch. Darina Allen of the Ballymaloe cookery school advises leaving some dough in a jam jar in the fridge and using it to flavour your next batch.
I took 2 lots of dough and left one in the fridge, nice and easy. The other one I mixed with a tablespoon of salt and left in a plastic box in a cool pantry. I left both of them for about a week.
Following the modern instructions, I made the weight up to a pound of flour, added a teaspoon of salt and sugar and warm water as if making ordinary bread but without any added yeast.
I first rinsed off as much surface salt as possible and then followed the 17th century instructions. I ripped the dough into small pieces, covered it with warm water and left the water to stand. A couple of hours later I strained the water and used it to make the bread. I used 1lb of flour, 1 tsp of sugar but no salt.
I left both sets of dough to rise overnight. It will probably come as no great surprise that the salted dough did not rise at all, not even a small amount. The salt had completely killed the yeast, even though it had stopped the dough going bad in storage. The fridge batch had risen quite well.
I mixed some instant action yeast into the flat dough, left them to prove in the tins and then baked them.
They were both slow to rise but they came out of the oven looking remarkably similar, there really was nothing to choose between them and more importantly they tasted pretty much the same as well. I would really have struggled to tell them apart, both had a subtle, sour flavour. Same result in flavour but one was a good, if slow, way of raising the bread, the other just added flavour.
A more interesting experiment that would take some years to do is Markhams recipe for course, brown bread for servants. This recipe is a mix of flours from different cereals and peas. He says to make especially sure to use boiling water to mix the dough as this stops the peas making the bread taste rancid and then he says to mix it and leave it in your sour trough over night. I am assuming that using the same wooden trough (and it must have been large for the quantities he was using) would have built up a yeast culture all of its own. He adds that if your trough is not sour enough then you can add some leaven or let it lie longer in the trough.
I am now going to be on the look out for people who have tried this. Any method that involves not washing all your equipment in antibacterial washing up liquid (which would kill the yeast) would not make the Environmental Health Department happy so I have to be a bit careful, still one day....
Wednesday, 27 March 2013
Tortelleti of Green Pease
In July I am going to have the huge privilege of cooking in a real Jacobean kitchen at Forty Hall in Enfield. They have asked me to cook vegetable recipes from the period using food from the allotments on site. I am very excited about all of this, my family are getting to try out some interesting recipes and anyone reading this page should be warned that there may well be a distinct vegetable theme as I practice recipes to find ones that are safe ( a lot call for raw egg, not happening in my kitchen,) seasonal (a lot use veg that are not in season in the summer) and edible.
My first one is Tortelleti of Green Pease by Robert May.
Robert May wrote his book, "The Accomplisht Cook" in 1660. He was trained in Paris before the civil war and returned to England after the restoration bringing with him all the fashions of the court in exile. His book gives a wide range of recipes including ones that would not have been out of place at a medieval feast to the latest fashions in French and Italian cookery. From the books of Jacobean cookery I have read so far, he gives quite a lot of recipes for vegetables. Only Evelyn's book on salads seems to have more.

"Take pease green or dry, French beans, or garden beans green or dry, boil them tender, and stamp them: strain them through a strainer, and put to them some friend onion chopped small, sugar, sinamon, cloves, pepper, and nutmeg, some grated parmisan, or fat cheese, and some cheese-curds stamped.
The make paste, and make little pasties, boil them in broth, or as beforesaid, and serve them with sugar, cinamon, and grated cheese in a fine clean dish."
This recipe could be interpreted as either a savoury main course where a pinch of sugar and spice brings out the flavour of the peas or you can see the peas as simply a food colouring and bulking agent. Cooks of the time were proud of being able to produce elaborate desert tarts with many different colours of filling. In a previous recipe he directs that the pasties be boiled in either strong broth, milk or cream. I chose to make a savoury version this time.
I like recipes with no quantities, I don't feel like I am cheating when I decide how much to put in! I must say that I went for 2 handfulls of peas to one medium chopped onion, a handful of grated cheddar, 2 tablespoons of yoghurt (instead of cottage cheese as I didn't have any in) and a small pinch of each of the spices and sugar.
May doesn't give a pastry recipe but in a previous recipe he says to make the paste with hot water. I used one for Chinese dumplings which is basically flour and water. I did this because I knew it would work and I have actually learnt how to do it properly. I am going to try Italian pasta in the future.

I know these are wobbly looking. In an earlier recipe for a meat version the author suggested that the cook might like to make the pasties in the shape of stars, fish, rolls or bean and peas. I have a long way to go, clearly. I think I probably would also need unlimited time and some well trained staff before I manage star
shaped ravioli.

As shapes go these are not that bad for Chinese dumplings. They may not be even but they didn't leak their filling and in the eyes of my friend Mrs Jao that is pretty important.

You don't need to taste or even read many 17th century recipes to see that our ancestors did not share our distinction between savoury and sweet food. Many recipes that we would see as main courses are actually quite sweet. Recipes frequently say that meat or vegetable pies should be served with "great store of sugar strewed over." Actually, given the hugs amount of hidden sugar in our food today you could argue that the Jacobeans were more honest about their sweet tooth.
Monday, 25 March 2013
Preserved Grapes 1660
"Take your fairest white grapes and pick them from the stalks, then stone them carefully and save the Juice, then take a pound of Grapes, a pound of fine sugar, and a pint of water wherin slices Pippins have been boiled, strain that water, and with your Sugar and that make a Syrup, when it is well scummed put in your Grapes, and boil them very fast, and when you see they are as clear as glass, and that the Syrup will jelly, put them into Glasses."I
I boiled one medium sized apple, sliced, in a pint of water for around 45 minutes until the water was yellow, but not cloudy. I drained the water off and topped it back up to half a pint. I didn't squeeze the apples as this would have made the jam cloudy.


And here we have the results, halved grapes in a jam or syrup. The fruit stayed quite firm and had I not halved the fruit it would have been almost complete. The question really is whether Hannah Woolley was able to de-stone grapes and still leave them intact or whether she chopped them in half as well.
Flavour, I must say that while this looks quite pretty, the photo doesn't do the lovely pale green colour justice, it didn't taste of very much at all. Admittedly I like a thick chunk of wholemeal toast for my breakfast and the strong taste of the bread probably didn't help. I think that this might make a very elegant addition to a scone and cream or a lovely filling in an otherwise simple sponge cake.
If you only had access to grapes for a very few weeks of the year then this would give you a light grape flavour for the rest of the year, if you could afford the sugar.

Sunday, 24 March 2013
Marmalade the old fashioned way
Once you start looking at old recipes for preserves you start to think that very little has changed. By the 1600s every recipes follows the 1lb of fruit to 1lb of sugar format that you would expect. Mustard recipes given in 1699 are virtually identical to ones you find on the internet today (but do suggest using a cannon ball to crush the seeds which is something so cool I have to keep mentioning it) and I have a recipe for chutney (or compost as they liked to call it) from the 14th century that would hold its own today. However, when I started to make the marmalade recipes they do differ quite a lot.
Delia Smith's marmalade recipe uses 2lbs of sugar to one lb of fruit. The fruit is peeled and the peel is boiled in the juice and water until soft. Sugar is added and the mix boiled rapidly until setting point is reached. This gives a medium dark, rich marmalade with a distinctive bitter taste that we recognise today as real marmalade. The 17th century seemed to prefer something much lighter, fruitier and sweeter. I have tried recipes from Elinor Fettiplace, writing in 1604 and Hannah Wolley, writing in 1660's.

.JPG)

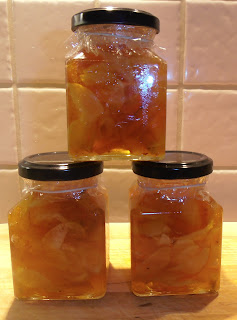 1lb of apples and 3 large oranges made 3 fairly small (7oz) jars of jam. In terms of selling it, that works out at about £2 a jar if you include the price of the jar as well.
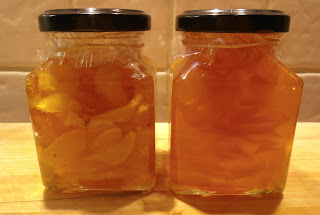 On the left is the 17th century marmalade and on the right is the modern one. Taste wise Lady Fettiplace's preserve is delicately flavoured. The orange taste is light and sweet with only a hint of bitterness left (I probably should have changed the water more often). The apple and orange peel holds it shape very well and provides a little texture to the jam. Overall, it is a very pleasant addition to the breakfast table. My family don't actually like my usual marmalade, they say it is too strong, I say, "all the more for those that do," and carry on making it just for me. They do like this version though. They tell me that it is not too strong and is much nicer. Looks like I will have some competition for these jars.
Delia Smith's marmalade recipe uses 2lbs of sugar to one lb of fruit. The fruit is peeled and the peel is boiled in the juice and water until soft. Sugar is added and the mix boiled rapidly until setting point is reached. This gives a medium dark, rich marmalade with a distinctive bitter taste that we recognise today as real marmalade. The 17th century seemed to prefer something much lighter, fruitier and sweeter. I have tried recipes from Elinor Fettiplace, writing in 1604 and Hannah Wolley, writing in 1660's.

The first difference you see is in the bitterness, where we love it and wait especially for the January Seville season to make our marmalade, they went to lengths to avoid it. Peel your oranges and boil the skin in several changes of water until the skin is soft and the bitterness is gone.
Second difference, apples! Both ladies use sliced apples or pippins in their recipes. This serves two purposes, it adds to the bulk of the preserve and it adds much needed pectin. Most of the pectin is in the skin and pips of the orange, if you remove these by changing the water then you need to get your setting agent from somewhere else.
As you can see from the picture above you end up with a lot of apple to not that much orange rind.
.JPG)
Third difference, FRUIT! Whereas modern marmalade can be described as jam with a bit of fruit it, with these recipes I ended up packing the fruit into the jars as tightly as possible to eek out the small amount of jam syrup that was left. What you get is a preserved fruit, large chunks of orangey fruit in a very sticky jam.

The fruit holds its shape very well but as my husband pointed out you don't so much spread it on your toast as arrange it as best you can. Using fresh, hot toast does help.


Seville Oranges
No posts for a while, partly because my family and I have been laid low with a very nasty cold and more importantly because I managed to get my hands on some late but very welcome Seville oranges. I have been spending all my spare time up to my eyeballs in orangey experiments, trying out recipes from the 17th century and stocking up on modern marmalade for the year to come. Post to follow on marmalade, orange cakes and candied peel.
Oranges in the 17th century were a huge treat and many hours were spent making them into elaborate sweetmeats for the banquet course at the end of celebration meals.
Marmalade was just the start, a sticky but very stiff confection that could be sliced, shaped or stamped into pleasing shapes as much for decoration as for eating.
The most impressive centre pieces would have been orangeadoes. These were preserved, whole oranges. Hilary Spurling gives a recipe in her fantastic book, Elinor Fettiplace's Receipt Book. Oranges were boiled whole in several changes of water, then the pulp was hollowed out through a small hole in the bottom of the orange the remaining skin was stuffed with sugar. More sugar, syrup and boiling later and you have a whole, preserved orange. I must say that I have not attempted this delicacy yet.

What I have tried so far are Elinor Fettiplace's white pippin and orange preserve and her orange cakes. Details to follow.
Oranges in the 17th century were a huge treat and many hours were spent making them into elaborate sweetmeats for the banquet course at the end of celebration meals.
Marmalade was just the start, a sticky but very stiff confection that could be sliced, shaped or stamped into pleasing shapes as much for decoration as for eating.
The most impressive centre pieces would have been orangeadoes. These were preserved, whole oranges. Hilary Spurling gives a recipe in her fantastic book, Elinor Fettiplace's Receipt Book. Oranges were boiled whole in several changes of water, then the pulp was hollowed out through a small hole in the bottom of the orange the remaining skin was stuffed with sugar. More sugar, syrup and boiling later and you have a whole, preserved orange. I must say that I have not attempted this delicacy yet.
What I have tried so far are Elinor Fettiplace's white pippin and orange preserve and her orange cakes. Details to follow.
Monday, 11 March 2013
Salsify, salsifax or viper grass
- When I planted this small parsnip look-a-like veg last year I thought I was indulging in some unusual gardening by planting something old-fashioned and interesting. Since then my veg box scheme have planted some for general sale next year and my sister tells me that her local supermarket in Leeds sells the stuff. So it may no longer be all that rare but it did fulfil my criteria of letting me try a taste of the past.
The earliest reference to salsify that I have found (and no I haven't looked very far before anyone asks) is in John Evelyn's Acetaria written in 1699.
Viper-graſs, Tragopogon, Scorzonera, Salſifex, &c. tho' Medicinal, and excellent againſt the Palpitation of the Heart, Faintings, Obſtruction of the Bowels, &c. are beſides a very ſweet and pleaſant Sallet; being laid to ſoak out the bitterneſs, then peel'd, may be eaten raw, or Condited; but beſt of all ſtew'd with Marrow, Spice, Wine, &c. as Artichoak, Skirrets, &c. ſliced or whole. They likewiſe may bake, fry, or boil them; a more excellent Root there is hardly growing.
More recently I have found growing instructions in Joy Larkham's veg growing book and in the pages of the before mentioned veg box scheme's cook book and I have to admit that one of the reasons I chose this particular veg to experiment with was that I could easily buy the seeds in the local garden centre.
Growing
As parsnip. Plant seeds in well hoed soil early in the year and leave them to get on with it until at least October. Leave in the ground until you are ready to eat them. The leaves are long and thin, the roots likewise.
These are the ones that came up straight and useful. About the same number had obviously not been in well prepared ground and came up forked and twisted.
Preparing
First of all I tried Evelyn's suggestion for eating it raw. I soaked 4 roots for 24 hours, changing the water after 12 hours. My plan was to try one root every day until I found out how long it took to soak out the bitterness. After the first 24 hours I couldn't detect any bitterness at all and neither could my husband, who is one of those people who always eats their veg raw if they can, so we went ahead and ate them.
Modern sources describe the flavour as delicate and they would be right. My husband thought it had a slight parsnip flavour, I thought is tasted most like water chestnut. Raw, it certainly has a texture and bite like water chestnut and that slight metallic zingyness I associate with them.
Then I boiled 3 in their skins. Modern recipes say that the sap they give off can make them stick to the pan when boiled and that the skin comes away easily once they are cooked. I boiled them and tested with a knife until they were at what I thought was an al-dente stage. That was about ten minutes for finger thick roots. Turns out this was way too long as the roots were impossible to peel and very soggy. However boiling had reduced the metallic edge (I wonder if that was what Evelyn meant by bitterness) and enhanced the flavour a little.
Lastly I peeled and thinly sliced the last 4 or 5 roots and fried them with some leeks and chorizo as recommended in a modern recipe. I fried them for quite a long time, until nice and crispy and served sprinkled on top of lamb. Now this tasted really nice. Chorizo and salsify work well together.
It is also possible to eat the young leaves of the 2 year old plant but unfortunately I had to dig up all my roots so I can't tell you about that for at least another year.
So why grow salsify?
It was in the ground for a long time and was not once bothered by slugs! I put the seeds in and off they went. It is slow to germinate but once it's up it seemed to be pretty hardy. Also you can leave it in the ground until you need it, all winter, a great consideration in the past. It might not taste of very much but it adds valuable diversity to the diet and the garden. If you lived in a time before supermarkets and freezers you needed to make sure that if one crop failed due to long wet summers or a plague of slugs then you had lots of other food to fall back on.
Subscribe to:
Comments (Atom)