What is Taste of the Past?

Taste of the Past is where I share my love of traditional cookery. Recipes from the days before TV dinners and microwaves right down the ages to the earliest cook books that I can get my hands on. I hope you enjoy my experiments as much as I do. Please share your own ideas, efforts and feedback in the comments.

Saturday 12 December 2015

Real Gravy

Real, Old Fashioned Gravy

Ok, making gravy is really very easy as long you are willing to go through the basic first step of roasting a large chunk of meat.  That bit out of the way, the rest is simple.

Instructions


1 Roast a chicken, keep it covered for most of the time and only uncover for the last 30 minutes when you want to give the bird a good baste with the juices anyway.
2 once cooked, remove the chicken to a plate, cover and leave for around 15 to 20 minutes to relax.
3 Put your roast tin on the hob over a very gentle heat
4 Add some liquid that will help de-glaze the pan.  I usually use a good slug of white wine here but you could also use, water from your boiling vegetable, beer (good if meat you roasted was beef), cider (pork) or red wine.  Even plain boiling water will do.  Use a good 4 tablespoons or so.
5 Use a wooden spoon to gently stir the liquids around and try to gently un-stick as much of the cooked on chicken as you can.
6 Let it simmer for a short while.
7 Pour the liquid through a sieve into a small sauce pan
Place back on the heat
Put 1 or 2 teaspoons of cornflour into a small, heat proof dish.
Bring the gravy back up to a simmer
Pour 1 tsp of gravy into the cornflour
Mix it up to make a paste, adding a little more as necessary.
You want a thick liquid.
The add a teaspoon of the cornflour paste back into the gravy.
As the cornflour boils it will thicken the gravy.
You will need to experiment with how much cornflour to add.
If you need more gravy then add more hot water, preferably from your boiling veg.

Adjust until you have a gravy consistency you like.  Try not to make more than you need as you will be watering down all that lovely chicken flavour.

Please, please. please do not add the cornflour straight into the gravy, it will be really lumpy and you will have to strain it again only this time your sieve will get really yucky with cornflour.  If you do do this, and to be honest, I have done it when in a rush, (big mistake), get the sieve into hot water immediately.

In theory it should be possible to thicken this with other types of flour such as potato flour or rise flour.  I haven't tried it but from using them to bake with I would try potato flour first.

Dairy Free Fish Pate

Hello, it's been awhile since I posted anything here, the time just seems to get away from me at the moment.  Anyway, this is more of a record for me but below is a rough recipe for dairy free fish pate.

My little boy can't really eat much dairy and lately I have been looking at ways of getting more fish into our diet.  Like a lot of English people I really am not that confident at cooking with fish.  I can take a large salmon, stuff with ginger and butter etc and produce a very nice dinner indeed.

In fact this general recipe of fish, stuffing, cover in pastry or wrap in paper and heat in some way is a good, basic recipe for a lot of fish I suspect.  However for those days when I don't want to spend most of the weekly shopping budget on one meal, I needed some new ideas.

So here it is:

1 tin of cooked butter beans
2 fillets of smoked fish (the kind you get vac-packed in the supermarket)
lemon juice
black pepper
olive oil or other oil

Blitz in the food processor.

That is really it.  I fond that I needed about 2 tablespoons of oil because the beans are so dry.  Be generous with the lemon and black pepper as well but leave them out if your family don't like them.

Spread on toast or stuff into pitta bread with some sliced cucumber and off you go.

Original recipe

1 small tub of soft cheese
smoked fish
black pepper
lemon juice

Blitze in food processor.

Both versions are delicious but the cheese based one is really creamy.

The bean based version is a bit lower in fat, dairy free and probably has a longer shelf life if stored in the fridge.

No photos today but the Cheese ones looks a pale cream colour and the bean based version looks a lot like humus.  It isn't very photogenic but my family just ate a lot of it.

Try adding your favourite combination of herbs to change the flavour.

Sunday 8 November 2015

Quince Experiments


Quinces

When I first started looking at old recipe books it rapidly became obvious that if I wanted to recreate a lot of he recipes I was first going to have to grow the ingredients for myself.  Yes, it is possible to buy fresh marigold and nasturtium flowers, English grown quince but they are all very very expensive.  Luckily for me they are turning out to be really easy to grow.  This picture shows one of my treasures, a patio sized quince tree.   In the foreground are some of the naturalised marigold flowers that are gradually taking over the my garden.  

Recipe books from the seventeenth century include a lot of recipes for quince.  I guess that these trees must have been relatively recent introductions and so house wives were busy swapping recipes to use up the large amount of fruit that a mature tree produces.  

These recipes though all use a lot of sugar and in the case of the one I have discussed below, gun tragacanth.  Both of these were expensive ingredients.  Yes, the 16oos saw the proliferation of sugar refining factories in London and slave labour in the West Indies made sugar even more affordable but it was still a very expensive luxury.  As for gun tragacanth, this is a powder made from the gum of a tree in the Middle East.  Today I had to pay £6 for a tiny weeny jar, about 2 teaspoons worth, imagine what it mush have cost a few hundred years ago.

I bought this tree two years ago now and this is the fits year I have had fruit and I was very excited to try some of my recipes out.  Unfortunately, I left them on the tree too long and only actually picked them when my children knocked some of them off.  On the surface they look  lovely but when I cut them open they were really quite brown inside.    


 This is the danger of growing unfamiliar produce.  However, when I chopped them all up there was a very definite difference between brown bits that were rotten and brown bits that were just brown.  Quinces are pome fruits, in the same family as apples and pears, so they do go brown when exposed to the air for any length of time.

I decided to carry on regardless and see what I could do.  with only 5 fruit and some of that too brown to use I did have a lot of options.   I opted to make the quince paste recipes from Elinor Fettiplace's cookbook, published and annotated wonderfully by Hilary Spurling.

Ingredients

Quince (English grown ones are not ripe, this recipe may not work with imported, ripe quince)
Castor sugar
Gum tragacanth

Method


Weigh out the quince fruit and put it in a food processor with equal quantity of sugar.  Process until you have a smooth pulp.  I used granulated sugar and I think that next time I will use caster sugar.


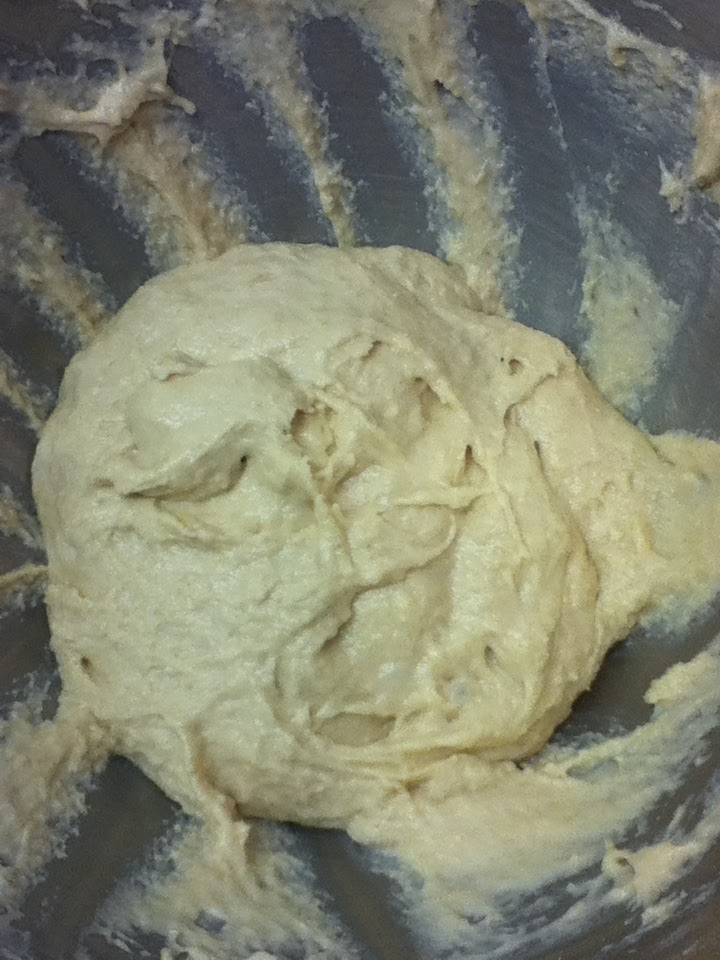
 At this point you have a sloppy mixture.
Drain it through a sieve into a jug (keep the syrup for other recipes, such as adding to apple jelly).


 Now is the guessing bit.
Make up a mix of gum tragacanth.  For each pound of sugar used you will need about 1 teaspoon of gum tragacanth.  Mix the powder in about 2 tablespoons of rosewater.  If you can find it, it does add a lovely fragrance to your cooking.  If you cannot find it then you could use apple juice, the strained juice from the quinces or even tap water.

This is the first time I have used it and it was a bit strange.  The gun does not mix well into the rosewater and I was left with white lumps that really took some mixing to get rid of.  In the end I just did the best I could and then mixed it into the quince paste.

The original recipe says that you should work the quince mix until you get a workable paste that you can roll out and stamp shapes in.  It does also says that if the mix is too runny then pour it into shallow dishes and leave it by the fire to dry.

My mix came out very runny indeed.  I poured it into an earthenware dish and left it on a trivet on top of my wood burning stove.  Unfortunately it got too hot and by the time most of the mix was thick enough and dry enough to remove, a good quarter of it had burnt onto the bottom.

When I took it out of the dish it was still very sticky so I then put it into a dehydrator that I borrowed from a neighbour.


 Then followed many many hours of dehydrating until I was left with a sticky and crunchy little sweet.

This sweet does taste very nice indeed.  However, it ha taken a lot of power to make it.  Like so many recipes from the past, and in this I include the fairly recent past as well as recipes from the 17th century, they assume that you have a fire going all the time and a steady, low heat source.  

Recipes like this were relatively easy for them as they had the heat available.  Today we have to be a bit more ingenious.  If you have an Aga style oven then these recipes should be no problem.  Similarly, a good, warm airing cupboard would also work but a little more slowly.  If, like me, you have a combi boiler and your airing cupboard is now just a vaguely warm place with some hot water pipes running through it then you need to use your oven on a very low heat or a dehydrator.  Both of these options get very expensive.

Links

https://en.wikipedia.org/wiki/Tragacanth
https://en.wikipedia.org/wiki/Hilary_Spurling
http://www.hobbycraft.co.uk/squires-kitchen-gum-tragacanth/599188-1000
http://www.amazon.co.uk/Elinor-Fettiplaces-Receipt-Book-Elizabethan/dp/0140088288/ref=pd_cp_14_2?ie=UTF8&refRID=08NRM4GF07A3GY858X60


Wednesday 7 October 2015

Crumpets

Introduction

This evening I am making crumpets.  Two reasons really, I need some pictures to advertise a course I am running that features, you guessed it, crumpets and also because sometime soon I am going to have a go at a gluten free version.  If anyone has made gluten free crumpets and would like to save me the effort of working out if it is possible, then please do get in touch.  What this blog is sadly lacking is links to other people.  A lone voice is never that effective.

So anyway, crumpets!  I love them.  Writing this has made me question exactly they I like them so much and I think the answer is because they are the bread that gives maximum honey absorption.  Scones are good for cream and jam.  The thickness of the dough and low sugar and fat content makes them a perfect partner for the calorie laden topping.  Honey though just drips off most things.  It is only the wonderful crumpet with all its holes that allows the honey to really shine.  Crumpets also contain no added fat and only a tiny pinch of sugar to start the yeast.  They are all white flour and milk.  If you made them with wholemeal flour they would be down right healthy.

Recipe to make 8 crumpets


100g white bread flour
100g plain white flour
200ml warmed milk (I used oat milk in these pictures because some of my family can't digest cow milk, still makes great crumpets)
1 tsp dried, instant yeast
1 large pinch sugar
150 ml tepid water
1/2 tsp bicarbonate of soda
Pinch of salt
Cooking oil
4 crumpet rings (I like the ones from Wilkinson, non stick and affordable)


Mix the two flours together in a bowl
Mix the yeast and sugar into the warm milk and stir well.


Until you have a nice, smooth dough.  Warning, it takes a lot of hard work to stir this dough.  You really need to persevere to make sure the gluten is well developed.  Dare I say it, but a mixer of some sort would be useful for people who find stirring a struggle.

Cover with cling film and leave to rise for about 1 hour or until it is well risen.  If it shows signs of deflating again then so much the better.

Dissolve the bicarbonate of soda into the terpid water. 
You might not need to use it all so make sure that the bicarb isn't all at the bottom.
Slowly add and stir until you have a thick pouring batter.  


Leave the batter again, this time for about 20 minutes.
As you can see from the picture below, it has gone all bubbly.  This is what we are looking for.  At this stage you want to get going as the bicarb will only last so long.


Grease a griddle pan or large frying pan and also lightly grease some crumpet rings.  I find that 4 is about all my large griddle can take.

Heat up but only to a low setting.  Crumpets are better cooked slowly.

Spoon crumpet mix into each one.  Only fill them about half full. As you can see from the next two pictures,  as the bubbles develop, the mix rises up and expands.

Also, slightly thinner crumpets are easier to cook through.


The crumpets are cooked then the top is very nearly set and the bubbles stay open.  It can take quite a few minutes to reach this stage.  If all has gone well then by now (the top one in the picture below) you should be able to gently slide the crumpet around and also remove the ring (with tongs!)

Remove the ring and flip over the crumpet. 

They benefit from cooking for another minute or two on the other side.

You can either eat them straight away or reheat them by popping them under the grill.

Home made crumpets will taste slightly crispy on the outside while being softer and fluffier on the inside.  Enjoy and let me know if you try to make them.


Thursday 1 October 2015

Doves Farm Gluten Free White Bread Mix - Review


I spent yesterday morning in a product research focus group.  If you think this sounds like a group of mums sitting around and drinking tea then you would be right.  (Can't have people thinking stay at home mums don't do anything all day.)  While keeping an eye on toddlers, picking apples for drying and swapping recipe ideas we also tried my new batch of Japanese quince jelly and talked a lot about gluten free products.  As I don't actually need to eat GF for my health it is really useful to talk to people who do.  Thank you Ladies.

The general feedback was that ready made products can be nice (I must have been trying the wrong ones) but a change in recipe can put people off something if they have trained themselves to like the taste.  Also and more importantly for me, that making your own GF bread at home results in bricks instead of loaves.

Clearly my small reviews could be useful to someone and so I shall continue.  Happy Reading.  Once I have finished going through the products available I will put together a list of advice on getting the recipe on the back of the packet to work, watch this space.

Yesterday was the turn of Doves Farm GF White Bread Mix.  As with my last experiment I followed the instructions on the back of the packet.

The first step involves warming milk and then mixing it with eggs and the the flour.
At this stage the dough looks craggy and stiff.  Then you stir in cooking oil.  This gives you a wonderful, smooth if slightly sticky texture.  My advice would be to stir really well.  If nothing else to make sure that the yeast is well mixed in and started.


Then you put in into a bread tin.  I line these tins because I can use a pencil to lark the level of the dough on the paper.  This tells me if the bread has risen at all.

Here it is ready to go in the oven, sitting next to another, wheat based, bread mix I was trialling.  The important point here is that both of these breads had instructions that told me to leave them for one hour to rise.  TO rise this much which is about 1 cm at the edge and 2 cm in the middle, they were left for well over 2 hours in a cool kitchen!

 This really is where I think most recipes are failing for people. Use your intuition and only cook the bead when it has actually risen.  Yes it will rise a bit more in the oven, this is called oven spring, but not that much.

Here is the final bread.  Light and fluffy with a soft crust and good crumb structure.  It made us all excellent toast this morning. 

All the technical points of this loaf are very good.  It will make toast, it will make sandwiches.   It does have that funny aroma I mentioned in other GF bread mixes and I think that is down to me being so used to the smell of wheat bread.  It is not bad, just very different.  Personally I think that this bread mix lacks flavour but I am not a big fan of white bread at the best of times.  It I make this again, and I will keep messing with the recipe until I get something great, then I will add some sunflower seeds or even oats (yes I know the issue with gluten contamination) and see what happens. 

Over all I think this has the potential to be the basis for great bread.  

Coming soon, trying to make these recipes without egg!  I have read about using gums or even chickpea flower as a binding agent so will be working on those as well. 

Happy Baking!


Tuesday 29 September 2015

Glebe Farm Gluten Free Bread

Every few months I get a request for gluten free baking.  It doesn't happen very often but it is getting more frequent.  So I thought it was time for a proper look at GF bread.

Last year I had some GF relatives staying and I made them Doves Farm Brown Bread Mix which I must say made a very good loaf of bread, once I had tweaked the recipe a little.  Unfortunately I wasn't in a planning ahead sort of mood and I didn't take any pictures.
This year I have someone on a bread course who needs GF bread.  It would be a bit embarrassing to serve something out of a supermarket packet and so I have been trying out some different packets of bread mix to see what happens.


Today was the turn of Glebe Farm. 

 (My review is intentionally a bit picky because I want it to be useful to other people.  Overall I would say that I like this product and would recommend it to other people.)

The first time I make any recipe I do actually follow the instructions.  Admittedly I usually then alter them a lot and it is pretty rare that I don't make some minor changes.  Actually most people should take a closer look at all recipe times and temperatures if nothing else as all oven vary.  Making small experiments could radically alter the quality of your baking.

But I digress.

What I want to say is that I followed the recipe on the back of the packet.  It makes a thick but runny batter that is a bit prone to lumpiness.  You do have to give it a really really good stir to get the lumps out.  The instructions say to leave to rise for 20 minutes before cooking. 


 After 20 minutes mine had done nothing.  (I put a small pencil mark on the lining paper to check this.)  In the end I left it for about an hour and half (due to school run) and it had rise about 1 inch.  
At this point I popped it in the oven for the 25 minutes recommended.  When it came out the tap on the bottom sounded a bit "damp" so I popped it back in for another 5 minutes without the tin.


I hope that from the photo you can see that it has a lovely, open texture.  It is definitely light and airy The crust is quite good, although a bit crackled.  This certainly does not detract from the overall quality of the bread.  

Flavour wise it does taste a bit strange on its own.  It also has a noticeable aroma, nothing bad, just not what I am used to as a bread smell.  However, once you have added jam (blackcurrant in this case)  it tastes just fine.  I have also tried it with my favourite oil and salt dipping mix and it did well. 

Overall, if I had to give up real bread tomorrow then I would be happy to live on this as a substitute and it tastes far better than any GF bread product I have tasted from a supermarket packet.  It was easy to make and the only change I would make to the packet instructions would be to add that you might need longer for the bread to rise depending on the temperature of your kitchen.   

Update!

My family really enjoyed this for breakfast this morning and it made very good toast.
Glebe Farm can be contacted via their website which is:
http://www.glebefarmfoods.co.uk/

Sunday 13 September 2015

Leek, Potato and Pea Soup

Introduction

A while ago I finally set up a Twitter account, mainly because I needed to actually get serious about advertising my bread making courses and also to see what everyone else was talking about.  One friend summed it up as, "Facebook is everyone sharing pictures of cats, Twitter is everyone sharing pictures of cakes."  Right up my street then. 

Being on Twitter has had two positive outcomes, first of all the need to feed the ever hungry internet information beast has finally given me the kick up the proverbial I needed to start writing again and also I have found some interesting new recipes and foody ideas.  

One of these foody ideas is Meat Free Mondays.  There is nothing like having to feed small children to make you look at your diet and decide that improvements have to be made.  You can no longer get away with munching a bowl of cereal in front of the TV on an evening just because you can't be bothered and you can no longer get away with ignoring vegetables,  If you try to then the ever present parent guilt centre of your brain will light up and prod you into action or send you to the nearest chocolate bar.  

To combat this I have been trying to cook more vegetarian food.  Luckily my kids like veg, my husband likes veg and I like it too, I just get fed up with all the peeling sometimes.  The real difficulty comes in finding good recipes.   Yes, there are meat free alternatives to most meat products available but they are quite expensive, tend to be a bit dry (to my personal taste) and vegetarian bacon!  That is a reason all in itself.  If you have never experienced vegetarian bacon then you are in for, well, an experience.

All this preamble serves as an introduction to my latest favourite recipe, Leek, Potato and Pea Soup. This comes from 1000 Recipes, a small but weighty cook book that was my Mum's favourite and is now mine.  Old fashioned, no pictures and lots of assumed knowledge but the best kitchen stand by I have, even, dare I say, more often consulted than Delia.

The beauty of this recipe is that if you eat it with whole meal bread then the peas and wheat combine together to give you a full range of proteins in one meal.  This makes it an excellent choice for vegetarians.  Vitamin C from the potato and plenty of greens from the peas and leeks.  

I know that I haven't specified quantities because it all depends on whether you want it to taste of peas, leeks or potatoes the most.  For those that would like guidance I recommend 2 medium leeks to 1 potato and 3 tablespoons of peas.  Add a good pinch of stock powder and 1 sprig of mint.

Leek, Potato and Pea Soup

Chop some leeks and heat in a pan on a low heat, the idea is to sweat them, rather than brown them.
Dice some potatoes and add them to the pan.
Cover the pan and let the veg sweat for 10 to 15 minutes.  Really the longer the better here. 
Boil some water and some vegetarian stock, following the instructions on the pack. 
Once the leeks are soft add the water and stock to the pan.
Stir and leave it to come up to a simmer. 
Simmer for around ten minutes or until the potatoes are soft.
Add the peas and some mint (fresh or dried both work here) and put the lid on and wait for the soup to come back up to the boil.
Once it has come to the boil a second time it will be cooked.
Turn off the heat and allow to cook a little.
To get a smooth consistency you can use a liquidizer, food processor or similar.  You can even just use a potato masher but this will leave the leeks in one piece.  Which is fine if you like them like that or you chopped them up small to begin with.

Enjoy with some bread and let me know if you try the recipe out please. 


Tuesday 8 September 2015

Allotment Pie


Introduction
This random assortment of food all started out with me wanting to cook something where I could say, "I grew this, well all the bits that are grown."  The result was a new take on an old favourite.  I have seen it called homity pie in Devon and Cornwall where it is made with potatoes, cheddar, friend onions and (optionally) bacon in a pastry case or some  people just call it cheese pie.

Ingredients
Boiled potatoes
Beans, peas or both (cooked)
Any other veg you fancy throwing in
Fried onions
A block of feta cheese
Dried mint, if you like it.

Instructions
Mix the cooked veg
Crumble up the feta
Sprinkle over the mint
Stir it up a bit but you want a good bit of the cheese near the top 
Pop into an oven at 180 degrees for around 15 minutes until the top is a nice crispy brown in places and the rest it nicely heated through.
If you are sure that all your ingredients are hot when you mix everything together then you can get away with putting it under the grill.

Other Ideas

You might have noticed that this is a great left over meal. Prepare and cook extra veg with a meal one day, mix with fried onions, feta and herbs for a second meal the next.

It would also work using some frozen mixed veg and tinned sweetcorn.

Frozen spinach or kale could be crumbled in as well, if you are trying to increase you veg quota.  Both work really well with feta.

Feel free to use the veg that you like!

Lastly, let me know if you try it out and what you think please?


Easy Home Meals

Introduction

The world is full of cake recipes, nearly as many as there are posts on the evils of sugar.  Some days I feel like my lively hood is based on peddling poisons and contributing to net world unhappiness.  So I thought it was time for a new series of recipes and posts, this time focussing on a subject that is much closer to my heart and much better for my own state of mental well being, namely, quick, easy and healthy dinners.

In these recipes I want to inspire people to cook real food from scratch.  In a time when most people get home late, often with hungry children in tow, it is easy to understand why we all reach for pre-prepared food that just needs popping in the oven.  Don't get me wrong here, I am not some sort of domestic goddess, I personally think that every house should keep some instant food in the freezer as a sound basis for stress free living.

However, there are also some things you can cook and the secret to doing this is being brave enough to throw away the recipe book.  Seriously, most foods do not need a recipe book or scales.  Half the time you don't have the right ingredients anyway or you family hates some key aspect.

I am hoping that people will take these recipes and make them their own.  If nothing else this will serve me as a list of "things I can cook" for days when I run out of ideas as well.

Lastly, before I start a new post with some actual recipe in it, please send me your comments and recipes too.  We all need inspiration sometimes.

Tuesday 12 May 2015

Bread Ovens


Hello again,

I have been very quiet on here for years.  Now I have slightly more time and more importantly a computer that will allow me to upload photos I am hoping to once again get writing.  Somehow my plans always seem to exceed my time but it doesn't stop me trying.

In the mean time, for those people who have stumbled across my site looking for information on historic cooking, have a look at this blog below.  It is all about wood fired ovens, something I really really want to have a go at, just as soon as I get around to it.

https://bakedinfire.wordpress.com/2015/05/11/a-clay-oven-the-beginning/

https://bakedinfire.wordpress.com/2015/05/12/the-first-firing/