What is Taste of the Past?

Taste of the Past is where I share my love of traditional cookery. Recipes from the days before TV dinners and microwaves right down the ages to the earliest cook books that I can get my hands on. I hope you enjoy my experiments as much as I do. Please share your own ideas, efforts and feedback in the comments.

Saturday 13 October 2018

Green Tomato Chutney

The best way I know to use up unripe tomatoes.  I will be looking for more recipes this week, I'll let you know if I find a good one.

2lb  green tomatoes
1lb of cooking apples
1lb of onions
500ml vinegar, (old recipes use malt vinegar, more recent recipes tend to opt for cider or white wine vinegar)
120z of sugar (I prefer soft brown sugar but see what you have the in cupboard)
 A good handfull of dried fruit (I like dates chopped small)
1 tsp cumin seeds
1tsp coriander seeds
1 tsp chilli flakes (optional)
2 tsp ground ginger
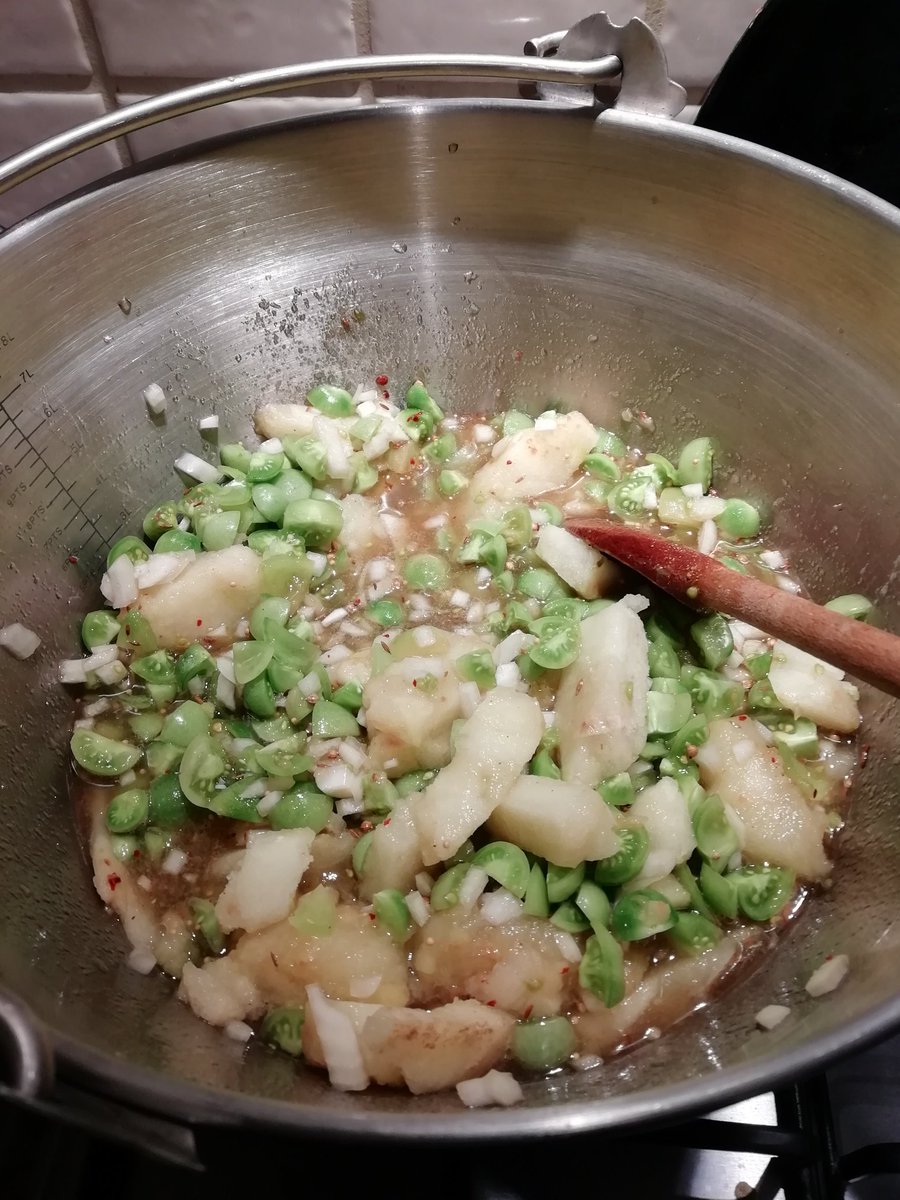
At the start, apple is in large chunks because it has come out of the freezer pre-chopped.

Chutney making is easy.  The secret is to spend time at the start chopping all your ingredients as small as you have the patience for.  No matter how small it looks on your chopping board I can guarantee that it will look much bigger in your sandwich.

Finely chop all of the ingredients that need chopping.
Put everything into a large saucepan.
Heat gently and stir until all of the sugar is dissolved.
Then bring up the temperature and give it a good boil.
You know when it is done when you can draw a wooden spoon across the bottom of the pan and see the bottom briefly.

Warning - chutney burns very easily at this stage and there is nothing so persistent and stinky as that of burnt chutney.  You will be smelling it for days.  So even though it seems like your chutney is taking ages, and it may well take ages, do no be tempted to wander off and leave it on the heat for even a few minutes.  It doesn't need constant stiring but it should be watched.

Once cooked you need to pot it up into hot, sterilised jam jars.

Try and leave it for a few weeks to even 3 months to let the flavours develop before you eat it.

A note on ingredients
Please don't worry if you don't have the exact ingredients.  There is a lot of scope for changing.  The earliest chutney recipe I have is from a historic cook book and that one uses honey and white wine instead of vinegar and sugar and the main veg is turnips!  It tastes a lot better than it sounds. 

Mix and match your ingredients, swap apples for pears, try other veg, use your favourite spices. 

Monday 30 July 2018

Help! My jam went wrong.


It is blackberry time again when lots of people are tempted to make jam.  Making jam is always a good idea and not something to be frightened off.

The most common question I get asked is why a batch of jam went “wrong.”  

My answer is always pretty much the same.  Unless you wandered off, forgot your jam and came back to a blackened, burnt, solid lump of jam toffee (and a tricky washing up task) then your jam probably did not go wrong.

For every "mistake" there is a perfectly good classification of preserve to rescue the day.  Just make sure that when you venture into the kitchen feeling like a domestic goddess ready to take on the world that you don't actually announce that you are going to make jam.  Tell them you are preserving and once you have finished and are admiring the fruits of your labour, decide what it is you have made.

Conserve

A conserve is runny jam, often described as loose set with larger pieces of fruit.
If your jam doesn’t set over night, bung the jars in the freezer where they will keep pretty much for years.  When you need one, take it out and serve your loose set, conserve with pride drizzled over scones and cream.  So much easier than trying to spread a set jam over your cream tea. 

Sauces

If it is really runny then whizz it up in the blender and pour your artisan coolie over vanilla ice cream for a divine dessert.  The colours are simply stunning and if you heat the coolie as well the taste is amazing.

If you are feeling very adventurous then you could gently fry and onion, add a splash of vinegar and some your very runny jam and whizz in the processor to make an interesting sauce for meat.

Fruit butters

If, when you open you jar of jam, you find that it has set quite hard and is difficult to spread the you have made a butter.  Fruit butters sometimes contain actual butter but not always.  They tend to have smaller pieces of fruit so make an issue of wanting to better mix the flavours.  These would make a good filling for jam tarts or baked puddings.

Fruit cheeses

If you need a knife to release your jam from the jar then congratulations, you have made a fruit cheese.  Carefully cut the jam out of the jar in a neat cylinder and slice thinly.  Serve the sliced preserve with British cheeses and a range of crackers for a top notch cheese board.

Remember, with all of these, do not tell anyone that your jam went wrong!


Sunday 8 April 2018

Healthy Snacks


It is that time of the year again....


...when you really crave something other than chocolate

Here are 3 recipes for something a bit more wholesome and very tasty.

Dukkah

Anyone listening to Radio 4 this week will have probably been hearing about the great cookery writer, Claudia Roden.  She is credited with introducing this lovely spice mix to Britain and indeed a lot of the rest of the world.  It is pronounced do'ha by the way (the wonders of radio versus a recipe book!)

Anyway, I don't have her original recipe and a quick internet search revealed that everyone has their own blend of favourite flavours so here goes with mine.  I apologise now for lack of accurate quantities, this isn't that sort of recipe.

4 tablespoons of nuts - lightly roasted
2 tablespoons of sesame seeds
1 table spoon each of coriander seed, cumin seed, fennel seeds
some salt, quite a lot of salt actually, this is a spicy salt mix
dried mint to taste, oregano would work as well.

lightly roast all of these in a dry frying pan or warm oven.
Crush the seeds and food process / crush the lot together.

Dip bread in olive oil and then the dukkah.
Sprinkle onto meat before grilling or roasting
Mix into yoghurt or mayonnaise for a lovely dip
any other ideas.....

Savoury Seed Mix

Take your favourite seeds, I use sunflower, sesame and linseed and flax.
Spread on a baking sheet in a thin layer.
Sprinkle over soy sauce, not too wet.
Roast at 180 and check every 5 minutes.
This cooks very unevenly so you really do need to check and stir the seeds every five minutes until they are evenly dry.
Take out of oven and while they cool a little bit pop a jam jar in the oven to sterilise it.
Add cold seeds to cold jar and seal.
If you leave the seeds around for too long they re-absorb all the moisture you have just cooked out and go sticky.

There are lots of recipes on the internet that include sugars, herbs and spices.  I avoid the sugary as they can really burn your oven tray very quickly.  Mixes of spices and salt are nice as well.

Dried Bananas

I don't usually go in for recipes that need special equipment but if you happen to have a dehydrator or an Aga then have a go.
Slice bananas, dip into lemon water and dry them out.


I run bread making course in Surrey, please visit my website for more details:
http://www.tasteofthepast.co.uk/saturday-bread-courses/


Sunday 23 April 2017

Dairy Free Chocolate Dessert


Dairy Free Chocolate Treat


When I was young I never really understood all the fuss about Christmas food.  Mince pies were OK but the pudding and cake were awful.  I didn't like the dried fruit, the funny spices, the thick, sickly icing or the cream.  To me Christmas dinner was one big roast dinner with the unwanted addition of smelly, mini-cabbage and dodgy looking beige gloop on the side.  Don't even get me started on trifle!  

Then one day my Mum bought Delia Smith's Christmas cook book and my outlook on Christmas changed forever.  Interesting starters appeared and on Christmas Eve and Boxing Day there was chocolate puddings.  First up was the Squidgy Chocolate Log and then there was the Chocolate Truffle Torte.  Oh my goodness, I was in utter heaven.  Best of all there were leftovers for days.

Fast forward a few year and it slowly dawns on me that the reason I grew up not likely anything with milk in was because milk disagrees with me.  However my Mum was not having me grow up with rickets and growing old with brittle bones.  Close on two decades of compulsory dairy products has left me with a learnt love of cream teas and a deep, psychological need to always have cheese in the fridge.

Sure, truffle torte made my stomach sound like a bubbling kettle but it was worth it for the shear heavenly taste.  Then I had kids and it is very obvious that they seem to be having issues with milk too.  I can't play fast and loose with their digestion and so I needed a dairy free alternative to my favourite Christmas treat and I needed it fast.  This is the result, a mix of chocolate, coconut and rum.  It doesn't have the depth as the Delia recipe but give me time and a few more tries and I will manage it.  In the meantime, please try this recipe and let me know how it goes, I think it is very nice indeed, if a little rich.

Recipe

200g dark chocolate (I use the really cheap, supermarket versions, feel free to be more generous)
100g creamed coconut block,
80 g boiling water
1 dessert spoon of run (or other favourite alcohol.  Or use a teaspoon of flavouring)
1 grated orange rind.
Melt the chocolate in a bowl over boiling water
Finely chopped the creamed coconut
Mix the creamed coconut with the boiling water and stir well until you get a creamy paste
Stir in the orange rind and the flavouring (if using)
Stir the cocnut mix into the chocolate, mix well
Pour or spoon into a a suitable container.  You can use just about any heat proof container for this.
Leave to too and then pop in the fridge to finish off


This cools to quite a solid dessert.  I am experimenting with using a little more water each time, an extra 10g, until I get a more creamy finish to the dessert.  At the moment it is like a chocolate bar left in a warm room.


Tuesday 24 January 2017

Cauliflower Rice

Hello,
This week I am having a try at low carb food.  (anyone who saw me eating cake lat night was imagining things :-)).  It isn't easy to reduce the amount of carbs in your life, or at least it certainly isn't cheap.

First of all, by carbs I mean the easily digested stuff that basically turns into sugar the nanosecond it hits your system.  White bread, white rice, white pasta, instant style oats, the highly processed stuff.  The carbohydrate in whole grains, seeds and nuts is all fine as the stuff you get in vegetables and most fruit.

That said there is a hierarchy of veg and fruit as well, some contains more sugar than others but at the moment, as I sit here craving a  slice of toast and marmalade like my life depends upon it I am not going to get hung up about the relative health levels of vegetables.  All veg is good, compared to a chip butty, it is all virtuous and brilliant, let us not split hairs.

Today's recipe is cauliflower rice with "stuff".  I had tried cauliflower rice before and had been unimpressed by the soggy yuckiness of it all.  This recipe is a mix of several I have found plus some of my own tweaking.  I promise lots of flavour and not a soggy spoon of veg in sight.


Ingredients

1 large cauliflower
1 - 2 (or even 3 onions)
some vegetables - I used a handful of green beans and a couple of carrots cut quite small.
1 tablespoon olive oil
spices to taste

I used Ras Al Hanout from Tesco which was lovely.  I think it would work really well with just about of your favourite flavours.

Method

Cut the cauliflower up into quite small chunks and use a food processor to turn them into "rice."
Spread on a baking sheet with plenty of space, a deep edge would be good.
Chop and fry the onion.
Depending on your spice you might want to add it now.  Most spices taste better cooked.  The ras-al-hanout was better sprinkled over at the end.
Add the other veg, cover the pan and gently saute.
Turn on oven to 180.
When veg are nearly cooked add htem to the cauliflower.  Stir well with a fork to get the rice nicely coated in the oil and spices.
Bake in the oven, uncovered for 15 minutes.  Check after ten, you might will probably want to stir it around so it cooks evenly.

I sprinkled the spice on when it came out of the oven.
Enjoy

Monday 16 January 2017

Coconut and Cherry Chewy Bites


These little treats are chewy, sweet and easy to make.  They are also made without flour so are gluten free.


Ingredients

2 eggs, well beaten
4 oz desiccated coconut
4 oz caster sugar
4 oz glace cherries, chopped small

Method

Chop the cherries, beat the eggs and mix all 4 ingredients together.
Oil a baking sheet
Use two large teaspoons to make neat dollops of mixture on the tray.  This mix is wet and sticky but does hold its shape well when baked.
Bake at 180 degrees C of 15 minutes.
Allow to cool slightly before moving onto a cooling rack.  This gives them time to firm up a little, if moved while hot they are more likely to break.

Thursday 24 November 2016

Christopsomo (Greek Christmas Bread)


 Every place in Greece has its own Christopsomo. Some families share it out at lunchtime on Christmas Eve and others at dinnertime. Some housewives decorate it with letters formed of dough and others use almonds and walnuts, I have used another traditional decoration, the Greek Cross.  Every region, town and indeed family, have their own recipe for this wonderful bread.  For a really authentic taste replace the orange zest and spices with a teaspoon of crushed masticha gum and a tablespoon of crushed aniseed.  I have also seen recipes based on vanilla, dried cherries or dried mixed fruit.

One of the things that I love about this recipe is that it works really well with gluten free flour.  The only change that you need to make is to bake the bread in a tin.  I used a metal mixing bowl to try and get the traditional shape.
Gluten Free Christopsomo
Traditional Christopsomo, served with thick butter and a cuppa


Ingredients


For the cake:
·         450g strong flour or gluten free flour
·         1 tsp instant dry yeast
·         1 tablespoon sugar
·         ½  teaspoon salt
·         200ml warm water
·         50ml olive oil
·         1 tsp ground cinnamon
·         1 pinch ground cloves
·         Grated zest of 2 oranges
·         2 tablespoons honey

For the glaze:
·         1 tbsp icing sugar
·         1 – 2 tbsp water


Recipe 

  • Place the flour into a mixing bowl along with the sugar and salt.
  • Mix them together and make a well in the flour.
  • Pour in all of the warm water and the dried, instant, yeast.  Mix a little of the flour into the water to make a thick, porridge like mix.  This is the sponge which will give the yeast a good start. 
  • Cover the bowl and leave for around 30 minutes while you prepare the other ingredients. (You can leave this for up to an hour.)
  • In a small jug, mix together the olive oil, honey, cinnamon, cloves and orange zest. 
  • After half an hour, mix the runny dough into the rest of the flour.  This will be very messy to begin with and get progressively harder.  I recommend using a wooden spoon.
  • Once it gets too stiff to mix easily, add the oil and honey mixture.
  • Now it is time to get your hands messy.  Mix the liquid into the dough until well combined.  The gluten free version might be best mixed with a spoon.
  • Take the dough out of the bowl and knead it gently on the work surface for eight to ten minutes.  This is a lovely, soft dough to knead which can mislead you into thinking it needs a lot less work than plain bread. 
  • Once you have a soft dough, place it into an oiled bowl, cover with cling film and leave until it doubles in size.  This could take 1 to 2 hours.
  • Heat the oven to 190 degrees C


Note:  Then making the gluten free version, knock back the dough and put it straight into a well greased tin.  Let is rise until nearly doubled in size and then bake as described below.
  • Gently knock back the dough and cut off a small piece, about the size of a golf ball.  Divide this into two, gently knocking out the air as much as possible.  Roll each piece into a sausage about 15cm long.  Using a dough scraper, cut the ends of each sausage in half for 5cm.  Place these on one side.
  • Take the main ball of dough and gently knock the air out of it by kneading it twice.  Then gently press it into a rough circle with your hands.  Then bring the edges of the circle into the middle and press down in the centre.  Turn the ball over and roll it against the work surface to form a tight ball.
  • Place on an oiled baking sheet.  Place the two sausages of dough in a cross shape on the loaf.  Curl the split ends outwards to form 2 small circles at the ends of the four arms of the cross.
  • Cover with oiled cling film and leave for half an hour or until nearly doubled in size.
  • Bake in a hot oven (190 degrees C) for 50 minutes.  When you place it in the oven, loosely cover with a sheet of foil.  Enriched breads like this one are prone to over browning. 
  • Make the glaze by mixing 1 tablespoon of icing sugar with 1 tablespoon of water to make a very thin water icing.
  • Check the loaf after 40 minutes and remove the foil if it is very pale.  Take the loaf out and gently knock on the bottom to gauge how much longer it needs.  Put the loaf back on the baking sheet and brush all over with the icing sugar glaze.
  • Put back in the oven for 5 to 10 minutes.
  • Leave to cool before cutting and serving.  The orange flavour will develop over a few